
Roles and Permissions
Roles combine permission sets and optional resource restrictions.
Role Screen Structure
Section titled “Role Screen Structure”Each role has two main tabs:
- Settings: role name and permission groups
- Resources: template/attribute-level restrictions
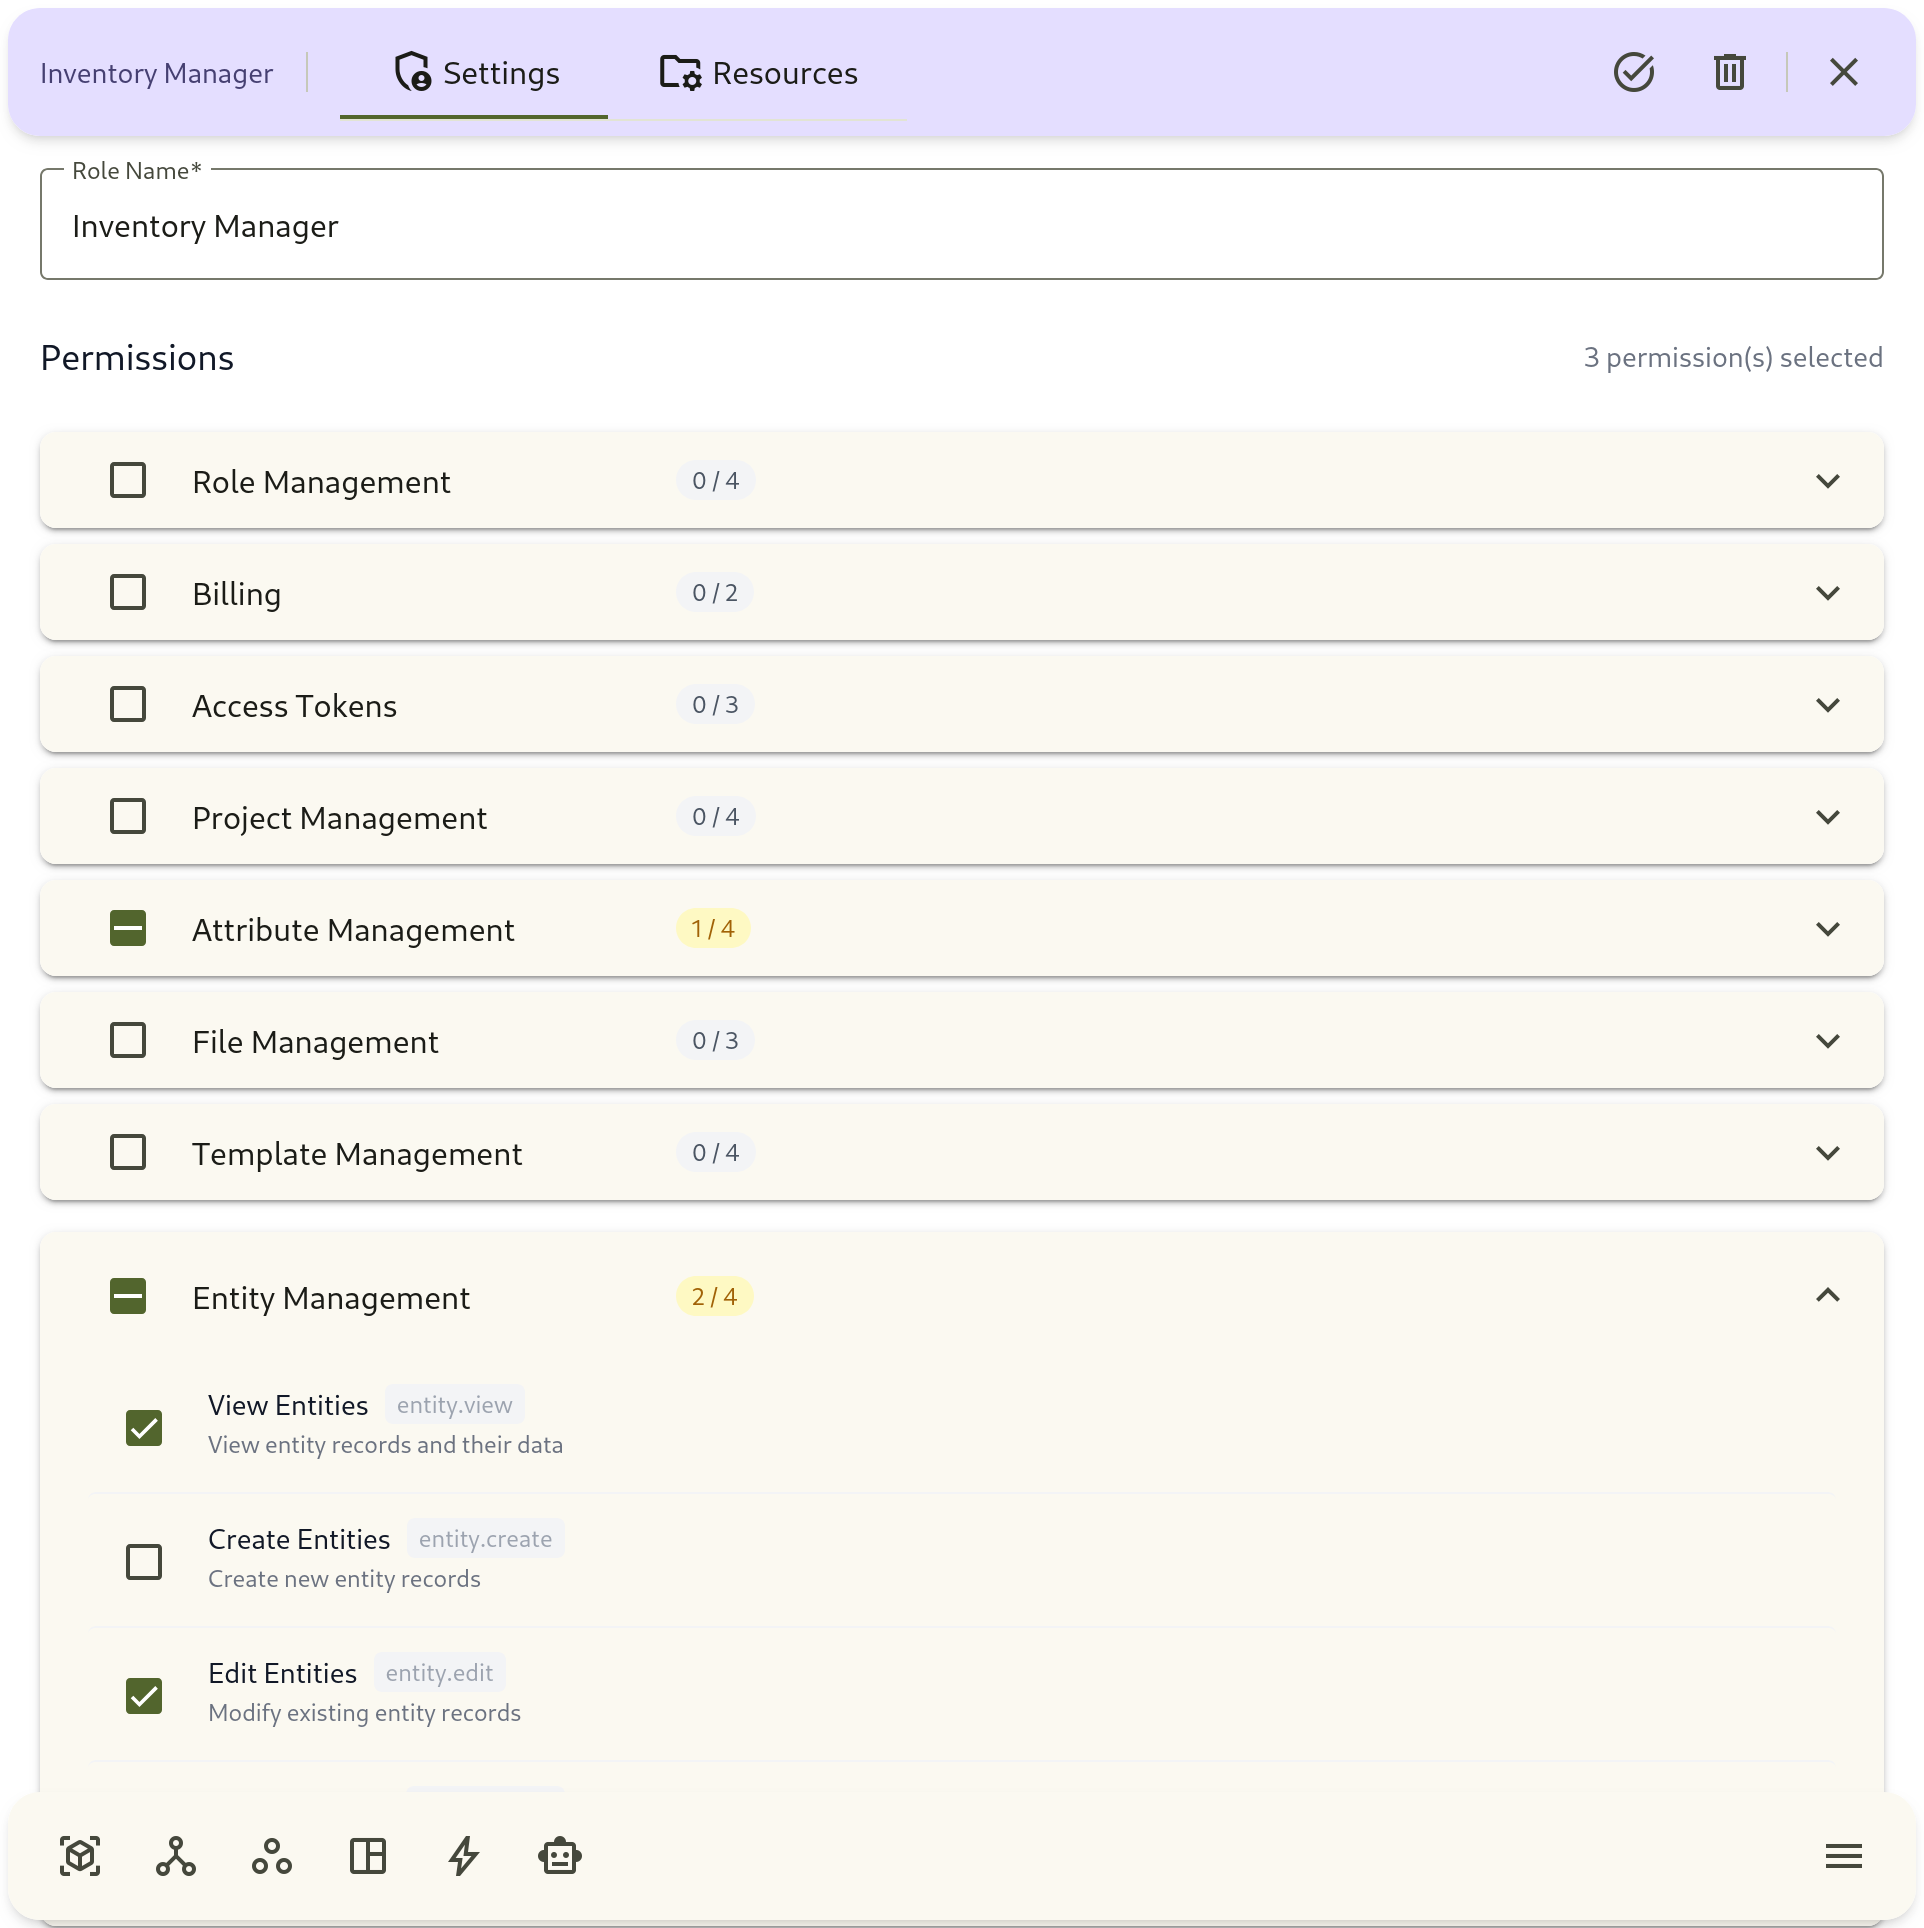
Settings Tab
Section titled “Settings Tab”Use Settings to define what this role can do.
Available Actions
Section titled “Available Actions”- Rename the role
- Grant or remove permissions across different feature areas
Permission Groups
Section titled “Permission Groups”- Role Management
- Billing
- Access Tokens
- Project Management
- Attribute Management
- File Management
- Template Management
- Entity Management
- Dashboard Management
- Automation
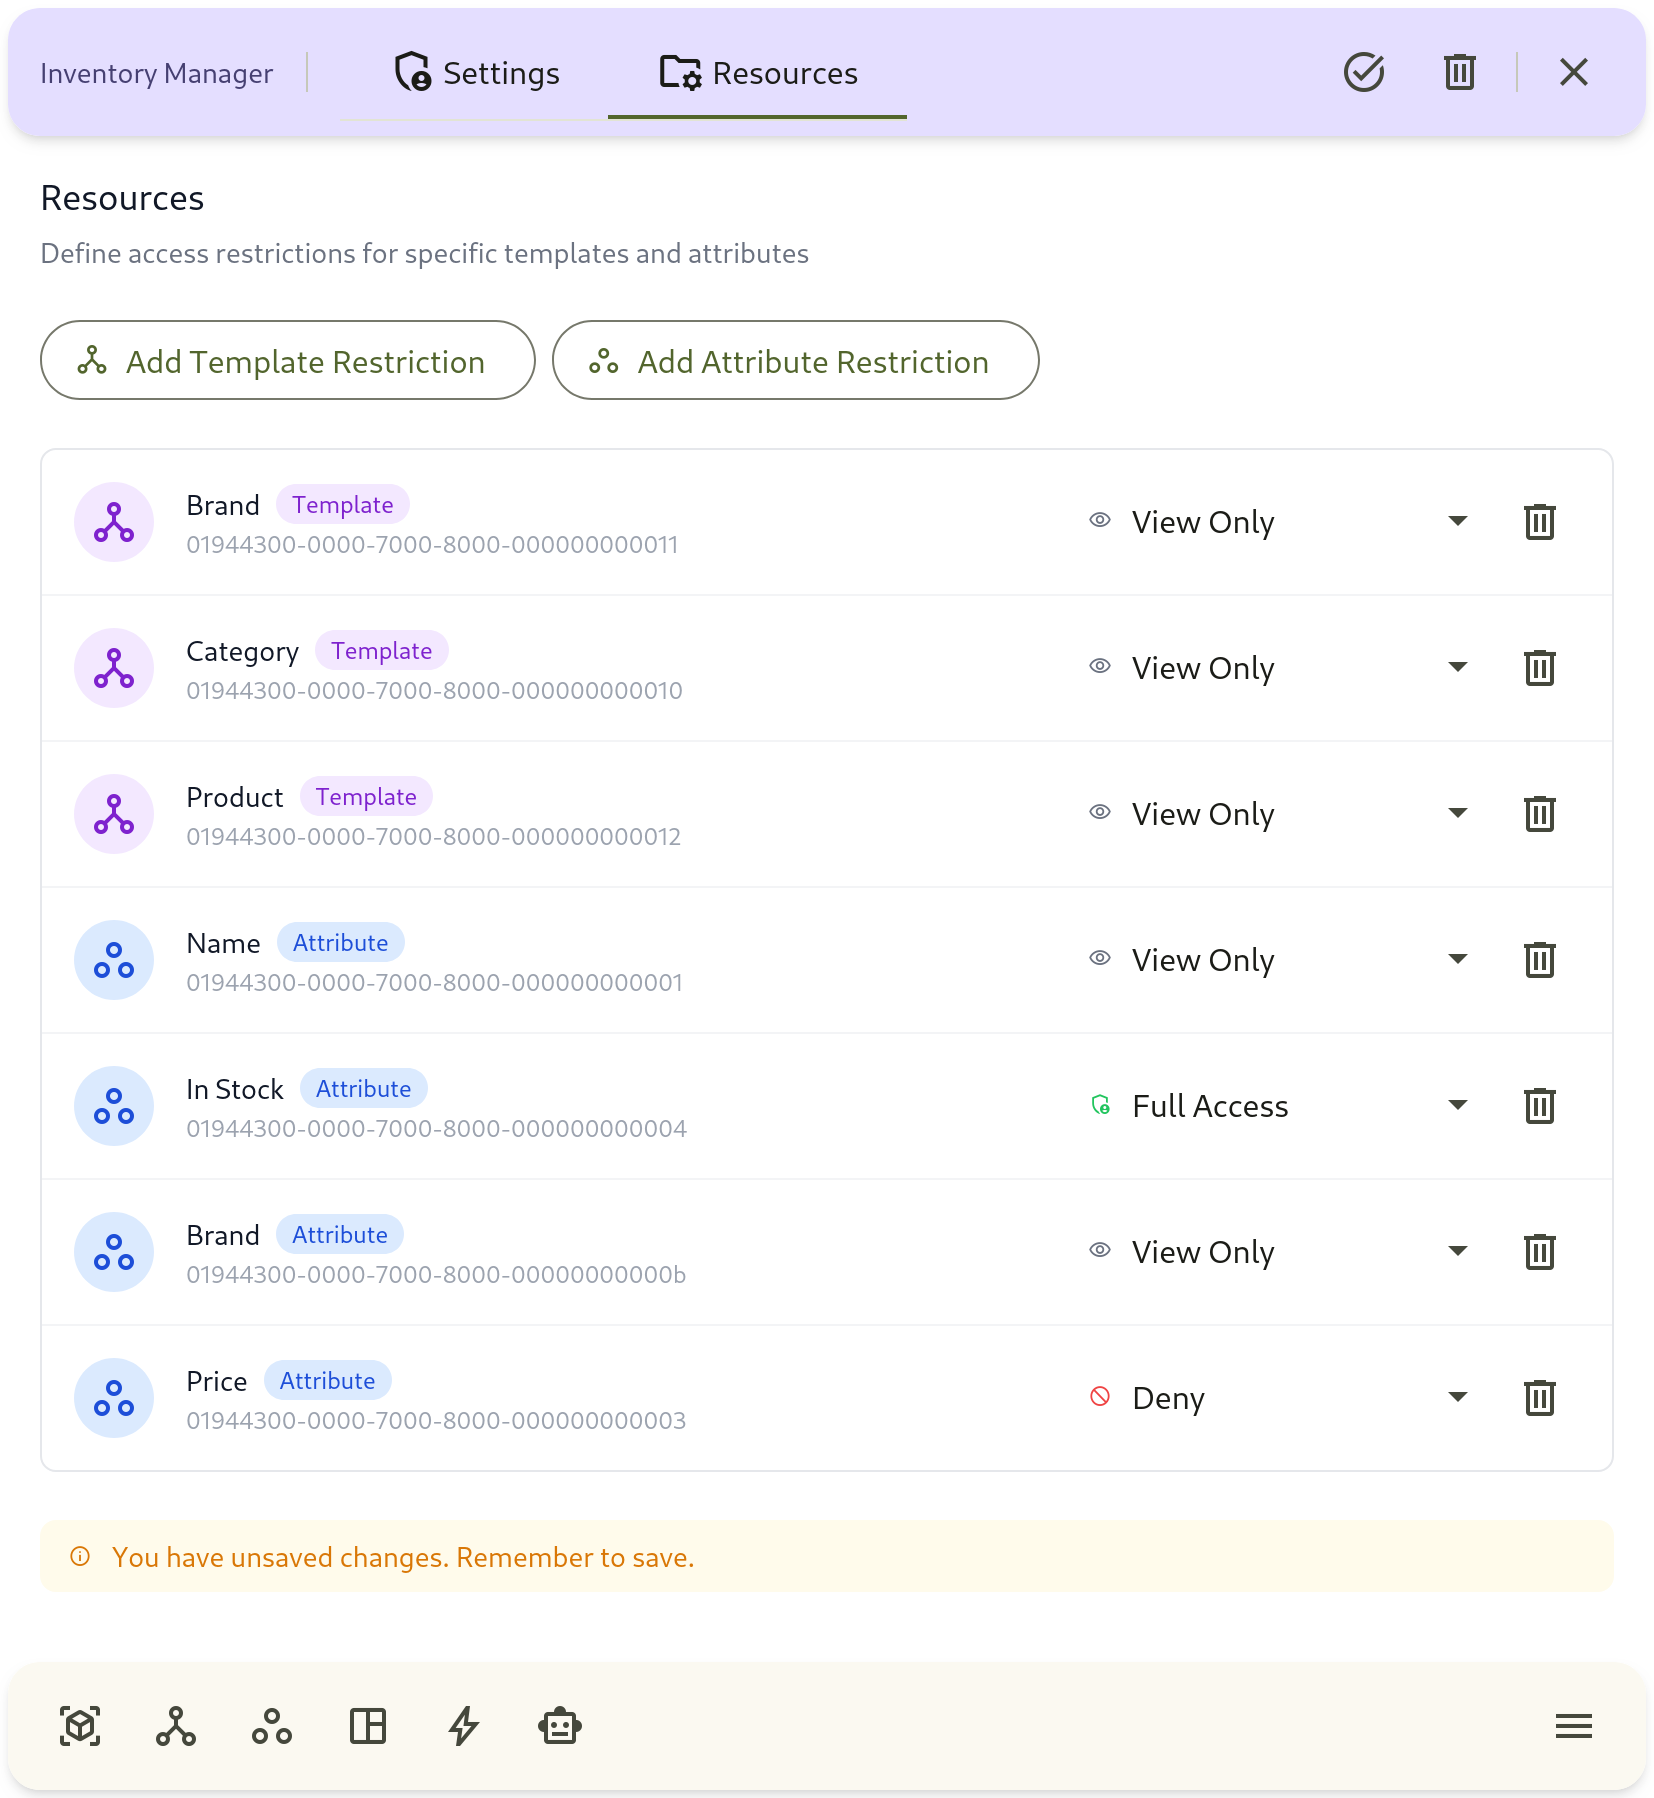
Resources Tab
Section titled “Resources Tab”Use Resources to limit access to specific templates and attributes.
Restriction Types
Section titled “Restriction Types”- Template Restriction
- Attribute Restriction
Access Levels
Section titled “Access Levels”- Deny: no access
- View Only: read-only access
- Edit: modify existing data
- Full: unrestricted actions for that resource
Restriction Workflow
Section titled “Restriction Workflow”- Open the role and switch to Resources.
- Add template or attribute restrictions.
- Set access level for each restriction row.
- Save changes.
- Validate behavior with a test user account.
Role Design Checklist
Section titled “Role Design Checklist”- Start from the job function (for example: Analyst, Manager, Admin).
- Grant minimum required permissions in Settings.
- Apply resource restrictions only where stricter boundaries are needed.
- Test with a non-owner account in a real project context.
- Review roles regularly as teams and workflows evolve.
Validation Checklist
Section titled “Validation Checklist”- Can the user open only the intended modules?
- Can the user edit only intended templates/entities?
- Are restricted templates/attributes hidden or blocked as expected?
- Are changes saved before closing role details?